Free Pallet Shed Plans: How to Build a Functional Shed for Your Garden

Free Pallet Shed Plans: How to Build a Functional Shed for Your Garden

Free Pallet Shed Plans: How to Build a Functional Shed for Your Garden

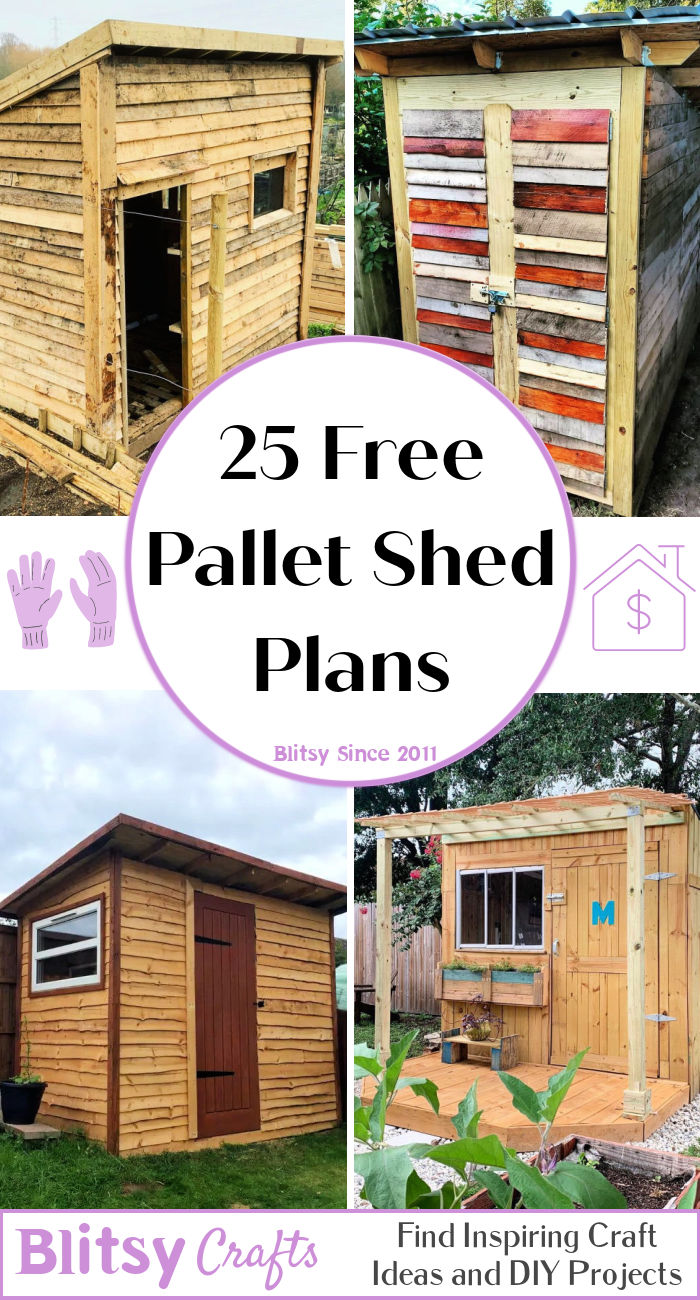
Constructing a garden shed offers invaluable storage space for gardening tools, equipment, and seasonal items. While pre-fabricated sheds provide convenience, their cost can be prohibitive. A resourceful and cost-effective alternative lies in utilizing reclaimed pallets to build a sturdy and functional shed. This detailed guide provides comprehensive free pallet shed plans, enabling even novice DIY enthusiasts to construct their own garden storage solution.

Assessing Your Needs and Site Preparation

Before embarking on the construction process, a thorough assessment of your specific needs and site preparation is crucial. This initial phase lays the foundation for a successful project.

Determining Shed Dimensions and Functionality

The first step involves determining the optimal dimensions of your pallet shed. Consider the amount of storage space required. Will you primarily store gardening tools, or will the shed house larger items such as lawnmowers or bicycles? Accurately estimating the necessary internal volume dictates the shed's overall footprint and height. Sketch a simple design outlining the intended layout, including shelves, hanging racks, and any other desired features. Remember to account for adequate aisle space for easy maneuverability within the shed.

Site Selection and Ground Preparation

The location of your shed significantly influences its longevity and usability. Choose a level, well-drained area that receives adequate sunlight for natural ventilation and minimizes potential dampness. Clear the selected site of vegetation, debris, and any obstacles. Assess the ground's stability; uneven terrain can compromise the shed's structural integrity. Consider laying a gravel base for improved drainage and a level foundation. This foundational layer prevents direct contact with the soil, minimizing moisture absorption by the pallet structure.

Sourcing and Preparing Pallets

The success of this project hinges on securing suitable pallets. The quality of the pallets directly impacts the shed's durability and longevity. Careful selection and preparation are critical stages.

Selecting Appropriate Pallets

Source high-quality pallets. Avoid pallets exhibiting significant damage, rot, or pest infestation. Ideally, opt for heat-treated pallets (marked with "HT") rather than those chemically treated (marked with "MB"). Heat-treated pallets are safer for environmental and health reasons. Inspect each pallet meticulously for broken or loose boards, ensuring structural soundness. Prioritize pallets of consistent dimensions to simplify construction.

Cleaning and Disassembly

Once suitable pallets are acquired, thorough cleaning is necessary. Use a stiff brush and appropriate cleaning solution to remove dirt, debris, and any remaining product residue. Carefully disassemble the pallets, removing nails and screws. Wear protective gloves and eyewear during this process. Inspect each board for damage and discard any compromised components. Organize the reclaimed boards by size and condition, preparing them for assembly.

Constructing the Pallet Shed Frame

The frame forms the structural backbone of the shed. Careful construction ensures stability and longevity.

Creating the Base Frame

Construct the base frame using the longest and strongest pallet boards. Create a rectangular frame according to the predetermined dimensions of your shed. Secure the joints using appropriate screws or galvanized nails. Ensure the frame is perfectly square and level. Consider reinforcing the corners with additional bracing for added stability.

Erecting the Walls

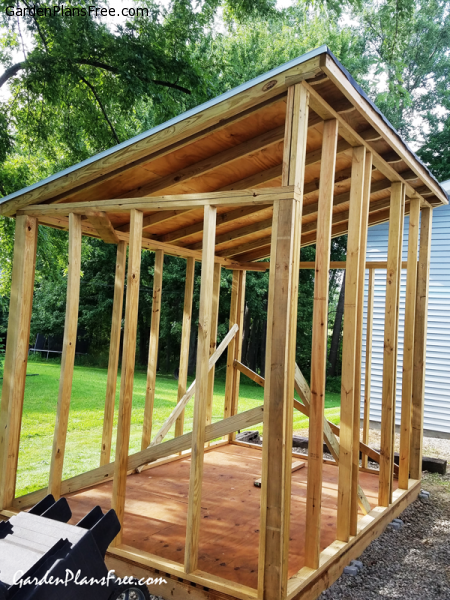
Assemble the wall sections using the remaining pallet boards. Position the boards vertically, creating a sturdy wall structure. Use additional bracing and cross-members to enhance strength and rigidity. You can create multiple wall sections individually and then connect them to the base frame. Ensure the wall sections are plumb and aligned with the base frame. Securely fasten the wall sections to the base frame using screws or nails.

Building the Roof Frame

The roof frame should be designed to withstand the elements. A simple gable roof is a practical and aesthetically pleasing option. Construct two triangular roof sections, using strong boards to create the rafters. Connect the rafters at the ridge and securely attach them to the top of the wall sections. Consider adding additional supports for enhanced stability, particularly in areas prone to high winds.

Completing the Shed: Roofing, Siding, and Finishing Touches

Once the frame is complete, focus on roofing, siding, and final touches that enhance functionality and aesthetics.

Roofing the Shed

Cover the roof frame with a suitable roofing material. While reclaimed pallets can be used for a rustic look, a more durable and weather-resistant option is recommended. Consider using roofing felt, corrugated metal sheeting, or recycled plastic sheeting. Ensure proper overlap to prevent leaks. Secure the roofing material using appropriate fasteners.

Adding Siding and Doors

Consider adding siding to the exterior walls for improved weather resistance and aesthetics. Recycled materials like more pallet wood or repurposed materials can be used for a cohesive aesthetic. Install a door using reclaimed pallet boards or purchased lumber. Ensure the door is securely hung and provides a weathertight seal. Adding hinges and a latch completes the door assembly.

Interior Finishing

Add interior shelving or hanging racks to maximize storage space. Consider painting or staining the interior walls and shelving for protection and aesthetic enhancement. Ensure adequate ventilation to prevent moisture buildup and mold formation. Adding a small window provides additional natural light and ventilation.

Safety Considerations

Throughout the construction process, prioritize safety. Wear appropriate personal protective equipment (PPE), including safety glasses, gloves, and sturdy footwear. Use caution when handling power tools and sharp objects. Follow all manufacturer's instructions for power tools and ensure the work area is well-lit and free of obstacles. Obtain assistance when necessary, especially for lifting heavy objects.

Building a pallet shed is a rewarding project that combines resourcefulness with practical skills. By carefully following these free pallet shed plans and prioritizing safety, you can construct a functional and durable garden storage solution that enhances your outdoor space while minimizing environmental impact.
Share:

How to Build a Lean-To Shed DIY: Practical and Easy Instructions

How to Build a Lean-To Shed DIY: Practical and Easy Instructions

Building Your Own Lean-To Shed: A DIY Guide

Dreaming of extra storage space without breaking the bank? A lean-to shed is the perfect solution! This simple structure, attached to an existing wall, offers practical storage without the complexity of a freestanding building. This guide provides a step-by-step approach, empowering you to build your lean-to shed with confidence, even if you're a DIY novice. Get ready to transform that unused space into a functional and valuable asset!

Planning and Preparation: Laying the Foundation for Success

Before you grab your tools, meticulous planning prevents costly mistakes later. Begin by deciding on the dimensions of your shed. Consider the available space against your existing wall, the amount of storage you need, and the materials you plan to use. Next, secure the necessary permits â€" building codes vary by location, so contacting your local authorities is crucial. Don’t skip this step; it could save you considerable trouble down the road. Finally, compile your materials list (detailed below). Accurate measurements are vital; double-check everything before purchasing to avoid unnecessary trips to the hardware store. Accurate planning sets the stage for a smooth and efficient building process.

Essential Materials

Gather these materials before starting your project. Remember to adjust quantities based on your shed's dimensions:

  • Pressure-treated lumber for the frame (4x4 posts, 2x4s for framing)
  • Plywood or OSB sheeting for the walls and roof
  • Roofing material (e.g., asphalt shingles, metal roofing)
  • Concrete or pressure-treated lumber for the base (depending on your chosen foundation)
  • Nails, screws, and other fasteners
  • Building wrap (to protect against weather)
  • Level, measuring tape, saw (circular saw recommended), drill, and other basic tools

Building the Foundation: A Stable Start

A sturdy foundation is paramount. You have two main choices: a concrete slab or a pressure-treated lumber base. For a concrete base, dig a trench and pour a level slab. Ensure it's appropriately sized for your shed's footprint. Alternatively, construct a base using pressure-treated 4x4s, creating a frame and securing it to your existing wall. This method is quicker but may require more frequent maintenance. Regardless of your choice, levelness is crucial. Use a level to ensure the base is perfectly horizontal; this prevents future structural issues. A level foundation supports the weight of your shed evenly and keeps everything aligned.

Framing the Structure: Constructing the Skeleton

With your foundation set, build the frame. Begin by attaching vertical 4x4 posts to your existing wall using sturdy brackets and appropriate fasteners. Then, construct the top and bottom plates using 2x4s, creating a rectangular frame. Ensure everything is square and plumb. Use a level and speed square consistently. Bracing the frame with additional 2x4s adds significant structural integrity. Carefully measure and cut all lumber; precision here prevents future problems. A well-built frame forms the backbone of your lean-to, ensuring stability and longevity.

Sheathing and Roofing: Weather Protection and Finishing Touches

Attach the plywood or OSB sheathing to the frame, creating solid walls. Use construction adhesive and nails for a secure bond. Ensure the sheathing is flush and weather-resistant building wrap over the sheathing to act as a moisture barrier. Finally, install your chosen roofing material, following the manufacturer's instructions. Consider adding extra support beams for heavy roofing materials. Proper installation protects your shed from the elements and increases its lifespan. Remember to carefully seal all gaps and joints to prevent water infiltration.

Finishing Touches and Enjoyment!

Once the roof is complete, you can add finishing touches like a door and a simple window for ventilation. Apply paint or stain to protect the wood. Consider adding some shelving for enhanced storage. Your new lean-to shed is now ready for use! Enjoy the satisfaction of a job well done and the increased storage space you’ve created. Remember regular maintenance will extend its lifespan. You have successfully transformed a simple idea into a practical and valuable addition to your property. Congratulations!

Share:

Step-by-Step Lean-To Shed Build: Quick and Easy Outdoor Storage

Step-by-Step Lean-To Shed Build: Quick and Easy Outdoor Storage

Step-by-Step Lean-To Shed Build: Quick and Easy Outdoor Storage

Hey there, fellow DIYers! So you're thinking about building a lean-to shed? Fantastic! They're a super practical way to add some extra storage space to your property, and honestly, they're way easier to build than you might think. This guide will walk you through the entire process, step-by-step, in a way that even a complete beginner can understand. Let's get started!

1. Planning & Preparation: The Foundation of a Great Lean-To

Before you even think about picking up a hammer, some serious planning is needed. This isn't about complicated blueprints â€" more about making sure you've got everything you need and know exactly what you're doing.

1.1 Choosing Your Location:

Where will your lean-to live? Consider factors like: proximity to your house (for easy access), sunlight (to keep things dry), and any potential obstacles like trees or underground utilities. Check your local building codes too; some areas have restrictions on shed size and placement.

1.2 Size and Design:

How much stuff do you need to store? A small lean-to might be perfect for tools, while a larger one could house garden equipment, bikes, or even a small workshop. Sketch out a basic design, considering the size of the wall you'll be attaching it to (the supporting wall). Keep it simple â€" rectangles are your friend! Aim for a design that’s proportionate to the supporting structure, otherwise, you could run into stability issues. Don’t be afraid to use graph paper to draw out your plans.

1.3 Gathering Your Materials:

This is where things get exciting (and potentially expensive!). Here's a basic materials list. Remember to adjust quantities based on your lean-to's dimensions:

  • Pressure-treated lumber for the frame (4x4 posts, 2x4s for rafters and walls)
  • Plywood or OSB (Oriented Strand Board) for sheeting
  • Roofing material (shingles, metal, etc.)
  • Nails or screws (exterior-grade)
  • Concrete or gravel for the base (optional, but highly recommended!)
  • A vapor barrier or building wrap (for the walls)
  • Measuring tape, level, saw, hammer/drill, safety glasses, work gloves

Tip: Visit your local lumber yard. They can usually cut the lumber to your specifications, saving you a lot of work (and potential mistakes!).

2. Building the Frame: The Backbone of Your Lean-To

With your materials gathered, let's build the framework. This is where a level comes in super handy!

2.1 Setting the Posts:

If you're building on concrete, this is straightforward: use appropriate fasteners to secure the 4x4 posts to the concrete base. If you're going for a gravel base, dig holes, set the posts in, and fill with concrete. Ensure they're plumb (perfectly vertical) using your level. For extra stability, consider adding concrete footings even with gravel.

2.2 Constructing the Wall Frame:

Attach 2x4s horizontally between the posts to create the wall frame. Space them evenly according to your chosen sheeting material. Use a level to make sure everything is square and true. This will create a sturdy foundation for your walls.

2.3 Framing the Roof:

This is where things get a little trickier, but still manageable. Cut your rafters (2x4s) to the correct length, ensuring they have the correct angle to drain rainwater effectively (a slight slope is crucial!). Attach them to the top of the wall frame and the supporting wall of your house. Use appropriate bracing to ensure the roof is strong and stable. Consider the additional support of a ridge beam for stability across the top of the rafters.

3. Sheathing and Roofing: Protecting Your Lean-To

With the frame complete, it’s time to add the sheeting and roof!

3.1 Sheathing the Walls:

Attach your plywood or OSB sheeting to the wall frame. Use exterior-grade screws and ensure proper spacing to allow for expansion and contraction. Remember to add your vapor barrier or building wrap for extra protection against the elements. This will help prevent moisture damage and keep your stored items dry.

3.2 Installing the Roofing Material:

Roofing can be a bit more involved, depending on your chosen material. Shingles require careful overlapping to ensure proper waterproofing. Metal roofing is often easier to install, but requires more robust tools and might be more expensive. Follow the manufacturer’s instructions carefully. Always work from the bottom up and make sure you have enough overlap to prevent leaks.

4. Finishing Touches: The Little Details That Make a Big Difference

Almost there! Here are some finishing touches to make your lean-to look and function better.

4.1 Adding a Door:

If you need a door, measure and cut an opening in your sheeting. Frame it with 2x4s for strength and install your door. Consider the type of door you wish to use (e.g., hinged, sliding).

4.2 Painting or Staining:

A coat of paint or stain will protect the wood from the elements and add a nice aesthetic touch. Choose an exterior-grade product designed for wood. Let the paint or stain fully dry before adding any items to your shed.

Commonly Asked Questions

Q: Do I need a building permit?

A: It depends on your local regulations. Check with your local building department to be sure. Smaller lean-tos might not require a permit, but it's always best to check.

Q: How long does it take to build a lean-to shed?

A: A weekend is often enough for a small lean-to, depending on your experience and the complexity of your design. Larger, more complex designs may take longer.

Q: Can I build a lean-to shed myself?

A: Absolutely! With careful planning and step-by-step instructions, building a lean-to shed is a manageable DIY project. Don't hesitate to enlist a friend for help with more physically demanding aspects.

Q: What kind of foundation is best?

A: A concrete slab or a well-built gravel base provides the most stability. Avoid simply setting the posts directly on the ground, as this will reduce the lifespan of your shed.

Q: What type of roofing material is best?

A: Asphalt shingles are a popular and relatively inexpensive option. Metal roofing is more durable and long-lasting but more expensive to purchase. Consider your budget and climate when making your selection.

And there you have it! Building your lean-to shed doesn't have to be a daunting task. With a little planning and some elbow grease, you'll have a fantastic new storage solution in no time. Happy building!

Share:

How to Make a Small Pallet Shed: Affordable and Sustainable Storage

How to Make a Small Pallet Shed: Affordable and Sustainable Storage

Building Your Dream (Mini) Pallet Shed: Affordable & Sustainable Storage

Hey there, fellow DIY enthusiasts! So, you're looking to build a small shed, huh? Maybe you're overflowing with garden tools, have a surplus of firewood you need to protect, or simply want a charming little extra storage space. Whatever your reason, building your own shed from reclaimed pallets is a fantastically affordable and sustainable option. Let’s dive into how to create your own mini pallet paradise!

1. Planning Your Pallet Shed Project

Before you even think about grabbing a hammer, a little planning goes a long way. This isn't rocket science, but a few minutes of prep work will save you headaches later on.

1.1 Choosing Your Pallet Size and Number:

The first thing to consider is size. How much storage do you *really* need? A tiny shed might be perfect for smaller tools and gardening supplies, while a slightly larger one can accommodate more substantial items. Remember, pallets come in various sizes, so factor that into your measurements. You'll likely need between 6 and 12 pallets, depending on your desired dimensions. Don't forget to measure the pallets themselves â€" they're not always perfectly uniform!

1.2 Location, Location, Location:

Where will your masterpiece reside? Make sure you have a level spot that’s accessible and won't interfere with anything else on your property. Consider proximity to power sources if you plan on adding electricity (more on that later!). Also, check local building regulations â€" some areas might have restrictions on shed sizes or placement.

1.3 Design & Sketching:

Grab a pencil and paper (or fire up your favorite design app!). Sketch out a basic design. Consider the height, width, and depth. Think about whether you want a single door, a double door, or even a small window for extra ventilation. A simple rectangular design is the easiest to build, but feel free to get creative!

2. Sourcing and Preparing Your Pallets

Now for the fun part (or at least, the slightly more adventurous part!): sourcing your pallets. Here's the deal: not all pallets are created equal.

2.1 Finding Your Pallets:

Check with local businesses. Many businesses are happy to give away their used pallets. Think hardware stores, construction sites, grocery stores â€" anyone who receives shipments on pallets. Just make sure to ask permission first! You can also check online classifieds or even Facebook Marketplace. Be aware that some pallets might be treated with chemicals, so ask about their treatment before using them.

2.2 Cleaning and Inspection:

Once you've got your pallets, it's time for a makeover! Give them a thorough cleaning to remove any dirt, debris, or â€" let's be honest â€" creepy crawlies. Inspect each pallet carefully for any damage. Replace or reinforce any broken or weakened boards. This extra step is crucial for ensuring the structural integrity of your shed.

2.3 Disassembly (Sometimes Necessary):

You may need to disassemble some pallets to get the individual boards you need for your build. This is where a crowbar, hammer, and some patience come in handy. Be careful, as the nails can be surprisingly stubborn. Safety glasses are a must for this stage.

3. Constructing Your Pallet Shed

With your materials ready, let's get building! Remember, this is a guide; adapt it to your specific design and pallet dimensions.

3.1 Building the Base:

You'll want a sturdy base. You can use more pallets or create a simple frame from treated lumber. This will prevent rot and keep your shed off the ground. Make sure it's level!

3.2 Assembling the Walls:

This is where your creativity kicks in! You can create walls using whole pallets or by using the individual boards from disassembled pallets. Use screws or nails to join them together and ensure the structure is stable. Depending on your design, you may need to cut or adjust some boards to fit perfectly.

3.3 Attaching the Roof:

The roof is important for weather protection. You could use more pallets, or for a more aesthetically pleasing and weather-resistant roof, consider using plywood or corrugated metal sheets. Make sure the roof has a sufficient slope to allow for water runoff.

3.4 Adding a Door:

A simple door can be made from a single pallet or several boards. Use hinges and a latch for security. Consider adding weather stripping for better protection against the elements.

4. Finishing Touches & Extras

Your shed is almost ready! Let's add some finishing touches for style and functionality.

4.1 Painting or Staining:

To protect your shed from the weather and enhance its appearance, consider painting or staining it. Choose a weather-resistant paint or stain that is suitable for outdoor use.

4.2 Adding a Floor:

If you want a more finished look, you can add a floor inside your shed using plywood, concrete, or even more pallets.

4.3 Adding Shelves or Hooks:

To maximize storage, consider adding shelves or hooks inside your shed for better organization.

5. Sustainability Considerations

Using reclaimed pallets is inherently sustainable, reducing waste and giving old materials a new life. But, you can take it a step further! Consider using eco-friendly paints and stains that are low-VOC (volatile organic compounds). Properly dispose of any scrap materials responsibly.

Frequently Asked Questions

Q: How long does it take to build a pallet shed?

A: The time it takes depends on your experience, the complexity of the design, and the number of pallets used. It could take anywhere from a weekend to a couple of weeks.

Q: Are all pallets safe to use?

A: No. Some pallets are treated with chemicals that might be harmful. Look for pallets marked "HT" (heat treated) â€" these are generally safe to use. Always ask the source about treatment before using any pallet.

Q: Do I need any special tools?

A: Basic hand tools such as a hammer, saw, screwdriver, and measuring tape are essential. Power tools like a drill and circular saw can speed up the process.

Q: How much does it cost to build a pallet shed?

A: The cost is incredibly low, primarily dependent on the cost of any additional materials (like screws, paint, and a roof). If you source free pallets, the cost is minimal!

Q: Can I add electricity to my pallet shed?

A: Absolutely! But, it's crucial to follow all electrical codes and regulations in your area. It's best to consult a qualified electrician for this part of the project.

And there you have it! Your very own mini pallet shed adventure is just a few steps away. Remember to prioritize safety and enjoy the process â€" happy building!

Share:

10x12 Pallet Shed Plans: Maximize Storage with Minimal Expense

10x12 Pallet Shed Plans: Maximize Storage with Minimal Expense

10x12 Pallet Shed Plans: Maximize Storage with Minimal Expense

Tired of overflowing garages and cluttered yards? Dreaming of a dedicated storage space without breaking the bank? A 10x12 pallet shed offers a surprisingly spacious and cost-effective solution. This guide provides detailed plans to help you build your own, maximizing storage while minimizing expenses. Forget expensive pre-fabricated sheds â€" you can construct a sturdy, weather-resistant structure using readily available materials and a little elbow grease.

Planning Your Pallet Shed: Laying the Foundation

Before you even think about hammering a nail, meticulous planning is key. Start by determining the ideal location for your shed. Consider proximity to your house for easy access, sun exposure (for natural light and ventilation), and the ground's levelness. A slightly sloped area might require additional leveling work, but a flat surface simplifies the foundation process significantly. Next, acquire your materials. Source free or inexpensive pallets from local businesses â€" construction sites, grocery stores, or even your local Craigslist are excellent starting points. Inspect the pallets carefully; ensure they're sturdy and free of rot or significant damage. You'll need approximately 30-40 pallets for a 10x12 shed, depending on the design and wall height.

Choosing the Right Pallets

Not all pallets are created equal. Look for pallets constructed from heat-treated lumber, indicated by an HT stamp. This ensures the wood is pest-free. Avoid pallets treated with methyl bromide (MB) as this chemical is harmful. Prioritize pallets with consistent dimensions and minimal damage for a structurally sound shed.

Construction: Building Your Pallet Fortress

Begin by preparing the ground. Level the area and create a foundation using concrete pavers, gravel, or even simply compacting the soil. This prevents moisture damage and provides a stable base. Now, start assembling the pallet walls. Use strong screws or nails, reinforcing connections with metal brackets for added stability. Consider staggering pallet layers for a stronger, more visually appealing structure. For the roof, you can utilize additional pallets or opt for a more traditional roofing material like corrugated metal or plywood, topped with asphalt shingles for added weather protection. Remember to leave sufficient space for a door and windows, positioning them strategically to maximize natural light and ventilation.

Essential Tools and Materials

You'll need a basic toolkit including a hammer, saw, screwdriver, drill, measuring tape, level, and safety glasses. Besides the pallets, consider purchasing additional materials like:

  • Screws or nails
  • Metal brackets
  • Roofing material (your choice)
  • Plywood for sheathing (optional, for a more finished look)
  • Weatherproofing materials (paint, sealant)

Finishing Touches: Enhancing Your Pallet Shed

Once the structure is complete, add the finishing touches. Apply a weather-resistant sealant or paint to protect the wood from the elements and enhance its lifespan. Consider adding a simple door and window frames for a cleaner look and improved security. You might even want to incorporate shelving using additional pallets or repurposed materials, maximizing storage space even further. Remember, the finishing touches are where you can personalize your shed to reflect your own style and needs.

Adding Personality and Functionality

Don’t be afraid to get creative! Paint your shed a vibrant color, add decorative trim, or even incorporate upcycled materials to create a truly unique space. Think about adding hooks for tools, shelves for storage, or even a small workbench depending on your planned usage.

Building a 10x12 pallet shed is a rewarding project that combines practicality with cost-effectiveness. By following these detailed plans, you can create a valuable addition to your property, providing ample storage while showcasing your DIY skills. Remember to prioritize safety throughout the construction process and enjoy the satisfaction of building something useful and beautiful with your own hands.

Share:

DIY Lean-To Shed: A Storage Solution That Will Change Your Backyard Forever

DIY Lean-To Shed: A Storage Solution That Will Change Your Backyard Forever

DIY Lean-To Shed: A Storage Solution That Will Change Your Backyard Forever

The accumulation of garden tools, outdoor furniture, and seasonal items can quickly overwhelm even the most organized backyard. A cluttered space not only detracts from the aesthetic appeal of your property but also hinders efficient use of available space. A practical and aesthetically pleasing solution to this common problem is the construction of a DIY lean-to shed. This comprehensive guide will equip you with the knowledge and steps necessary to build a robust and functional lean-to shed, transforming your backyard from a chaotic jumble into an organized and efficient haven.

Planning and Design: The Foundation of Success

Before initiating construction, meticulous planning is paramount. This phase involves determining the shed's size, location, and materials, ensuring compliance with local building codes and regulations. Careful consideration of these aspects will contribute to the long-term success and utility of your lean-to shed.

Determining Dimensions and Location

The dimensions of your lean-to shed should be carefully considered based on your storage needs and the available space in your backyard. Consider the items you intend to store and estimate the space required to accommodate them comfortably. Accurate measurements are critical to ensuring the shed fits seamlessly within its designated area. Furthermore, the shed's location should be strategically chosen, taking into account factors such as sunlight exposure, proximity to power sources (if required for interior lighting or tools), and ease of access.

Material Selection: Durability and Aesthetics

The choice of materials significantly impacts the longevity and aesthetic appeal of your lean-to shed. Pressure-treated lumber is a popular choice for its resistance to rot and decay, ensuring the structure's durability against the elements. Metal roofing provides excellent protection from rain and snow, while vinyl siding offers low-maintenance aesthetics. Consider the overall style of your home and garden when selecting materials to ensure a cohesive look. Always source materials from reputable suppliers to guarantee quality and longevity.

Building Codes and Permits

Before commencing construction, it is crucial to research and adhere to all local building codes and regulations. Depending on your location and the size of your lean-to shed, you may require a building permit. Contact your local building department to obtain the necessary information and ensure compliance with all applicable regulations. Failing to obtain necessary permits can lead to significant fines and potential demolition of the structure.

Construction: A Step-by-Step Guide

With meticulous planning complete, the construction process can begin. This phase involves several key steps, from laying the foundation to installing the roof and siding. Precision and attention to detail are crucial at each stage to ensure a stable and robust structure.

Foundation Preparation

A level and stable foundation is essential for the longevity of your lean-to shed. Begin by clearing the designated area and leveling the ground. A concrete slab is a durable and reliable option, providing a solid base for the structure. Alternatively, a gravel base, carefully compacted and leveled, can provide adequate support, particularly for smaller lean-to sheds. Ensure the foundation is appropriately sized to accommodate the shed's dimensions.

Framing the Structure

The framing process involves constructing the shed's skeleton. This typically involves erecting vertical posts, supported by horizontal beams and braces. Accuracy in measurements and precise cuts are crucial to ensure the structural integrity of the shed. Use appropriate fasteners, such as galvanized nails or screws, to secure the framing components. Ensure all connections are strong and secure, capable of withstanding the stresses of wind and snow.

Roof Installation

The roof is a critical component of the lean-to shed, protecting its contents from the elements. The design should ensure adequate water runoff and drainage. Secure the roofing material according to the manufacturer's instructions, ensuring proper overlap to prevent leaks. Proper ventilation should also be considered to prevent moisture build-up.

Siding and Finishing Touches

Once the framing and roofing are complete, the siding can be installed. This adds aesthetic appeal and further protects the structure from the elements. Follow the manufacturer's instructions for installation and ensure proper sealing to prevent moisture penetration. Final touches may include adding a door, windows, and interior shelving to customize the shed to your specific needs.

Safety Precautions and Considerations

Safety should be a paramount concern throughout the entire construction process. Always wear appropriate safety gear, including safety glasses, gloves, and work boots. Use caution when operating power tools and follow all manufacturer instructions. Ensure the work area is well-lit and free from obstructions. If working at heights, use appropriate scaffolding and safety harnesses. Proper planning and careful execution will minimize risks and ensure a safe construction process.

Essential Tools and Equipment

Before starting, gather the necessary tools and equipment. This may include:

  • Measuring tape
  • Level
  • Circular saw
  • Drill
  • Hammer
  • Screwdriver
  • Shovel
  • Post hole digger (if necessary)
  • Safety glasses
  • Work gloves

Dealing with Unexpected Challenges

During construction, unexpected challenges might arise. Having a contingency plan is essential. This could involve addressing uneven terrain, adapting to unexpected weather conditions, or modifying the design based on encountered difficulties. Flexibility and problem-solving skills are crucial for successful project completion.

Conclusion: Enhancing Your Outdoor Living Space

Constructing a DIY lean-to shed is a rewarding project that significantly enhances the functionality and aesthetic appeal of your backyard. By following this comprehensive guide, paying close attention to detail, and prioritizing safety, you can create a durable and practical storage solution that will serve you for years to come. The transformation from a cluttered and disorganized space to an organized and efficient outdoor haven is a significant improvement to your property and quality of life. Enjoy the process of building your own lean-to shed and the satisfaction of a job well done.

Share:

Make a Small Pallet Shed for Your Yard with Recycled Pallets

Make a Small Pallet Shed for Your Yard with Recycled Pallets

Constructing a Small Pallet Shed for Your Yard Utilizing Recycled Materials

This document details the comprehensive process of designing and constructing a small shed for backyard use, leveraging the sustainable practice of repurposing reclaimed pallets. The project emphasizes cost-effectiveness, environmental responsibility, and the satisfaction derived from creating a functional outdoor structure from readily available materials. While familiarity with basic carpentry techniques is beneficial, this guide provides sufficient detail to allow even novice builders to undertake this project successfully.

Phase 1: Planning and Material Acquisition

Before commencing construction, meticulous planning is paramount. This phase encompasses defining the shed's dimensions, sourcing suitable pallets, and procuring necessary supplemental materials. The dimensions should be tailored to the intended purpose and available yard space. For a small shed, dimensions of approximately 6 feet by 4 feet and 6 feet in height are a practical starting point.

Selecting and Assessing Pallets

The success of this project hinges significantly on the quality of the reclaimed pallets. Not all pallets are created equal. Prioritize pallets constructed from strong, untreated lumber. Avoid pallets displaying significant damage, such as rot, warping, or broken boards. Inspect each pallet carefully for any signs of infestation by insects or signs of chemical treatment. Ideally, pallets used for food products should be avoided due to potential hygiene concerns. Aim for pallets with consistent spacing between boards for easier assembly.

Gathering Supplemental Materials

While pallets form the primary structural components, supplemental materials are essential for creating a robust and weather-resistant shed. This includes:

  • Pressure-treated lumber for the base frame: This provides a durable and rot-resistant foundation.
  • Concrete blocks or a suitable alternative for the base: These ensure stability and prevent ground rot.
  • Roofing material: Options include corrugated metal sheeting, asphalt shingles, or even salvaged roofing materials.
  • Hardware: This includes screws (exterior-grade galvanized screws are recommended), nails, hinges, a latch or padlock, and possibly additional bracing materials.
  • Weatherproofing sealant: A high-quality sealant will protect the wood from moisture damage.
  • Optional: Plywood or OSB for sheathing, paint or stain for exterior finishing.

Phase 2: Foundation and Base Construction

A stable foundation is crucial for the longevity of the shed. This section details the construction of a simple yet effective base using pressure-treated lumber and concrete blocks.

Preparing the Base

Begin by clearing the chosen location of any debris, grass, or uneven ground. Level the ground as smoothly as possible. This will ensure the shed sits level and prevents potential instability. The use of a spirit level is highly recommended for accurate leveling. Mark out the dimensions of the shed's base on the ground using string and stakes.

Constructing the Base Frame

Cut and assemble a rectangular frame using pressure-treated lumber. The dimensions of this frame should correspond to the external dimensions of the shed. Secure the corners using robust joinery techniques, such as mortise and tenon joints, or reinforced with metal corner brackets. Ensure the frame is square and level using a measuring tape and spirit level.

Setting the Foundation

Position the concrete blocks at each corner of the frame, and if necessary, along the sides for added support. Ensure the blocks are level with each other. The frame can then be secured to the concrete blocks using appropriate fasteners.

Phase 3: Pallet Wall Construction

This phase involves assembling the pallet walls, which form the primary structural elements of the shed. Carefully consider the orientation of the pallets to maximize structural integrity and aesthetic appeal.

Preparing the Pallets

Inspect each pallet for any loose boards or damaged components. Secure any loose boards with screws or nails. Remove any protruding nails or staples to avoid injuries during construction. Consider cleaning the pallets with a wire brush to remove dirt and debris.

Assembling the Walls

Position the pallets vertically, aligning them to create the shed's walls. It is recommended to use at least two pallets for each wall section for enhanced strength. Securely fasten the pallets together using exterior-grade screws. Add additional bracing between the pallets for increased stability. Ensure the walls are plumb and aligned to the base frame. Consider using additional lumber to fill any gaps or reinforce weaker areas.

Phase 4: Roof Construction and Finishing

The roof is a crucial component, protecting the shed's contents from the elements. This section details the construction and finishing touches that will complete your small pallet shed.

Roof Framing

Construct a simple roof frame using pressure-treated lumber. The framing should extend beyond the walls to create an overhang, protecting the walls from rain. The frame can be a simple gable roof or a shed roof, depending on your preference and design capabilities. Secure the roof frame to the top of the walls using appropriate fasteners.

Roofing Material Application

Apply the chosen roofing material according to the manufacturer's instructions. Ensure proper overlapping for water tightness. Secure the roofing material using nails or screws designed for the specific material.

Finishing Touches

Apply a weatherproofing sealant to all exposed wood surfaces to protect against moisture damage. This is crucial for the longevity of the shed. Consider adding a door using reclaimed pallet wood or purchased lumber. Install hinges and a latch or padlock to secure the door. If desired, paint or stain the exterior of the shed for enhanced aesthetics and protection.

Phase 5: Inspection and Maintenance

Upon completion, conduct a thorough inspection to ensure all components are securely fastened and the structure is stable. Regularly inspect the shed for any signs of damage or deterioration, and address any issues promptly. Periodic maintenance, such as resealing and repainting, will extend the lifespan of your recycled pallet shed.

This comprehensive guide offers a practical approach to building a functional and aesthetically pleasing small pallet shed. Remember to prioritize safety throughout the project, using appropriate safety gear and adhering to best practices for woodworking. The successful completion of this project will not only provide a useful addition to your yard but also contribute to a more sustainable approach to construction.

Share: