Quick tips for modifying storage shed plans

Quick tips for modifying storage shed plans


Alright, you've got the shed plans. You're excited. You can practically smell the fresh-cut wood and hear the satisfying thwack of the hammer. But hold on, cowboy! Before you dive into the build, let's talk customization.

Think of those plans as a starting point, a great foundation. But you, my friend, have the power to make this shed uniquely yours. You can make it taller, wider, add windows, or even throw in a cute little porch.

Here's the thing: Modifying shed plans can be a bit intimidating, especially for a first-time builder. But don't worry, I'm here to guide you through the process. Think of it as taking a perfectly good recipe and adding your own special touch. You can still make a delicious meal, it just might be even better with your personal twist.

### The Basics: Understanding the Blueprint

Before we start adding fancy extras, let's get familiar with the basics. Take a good look at those plans. It's like reading a blueprint for your shed.

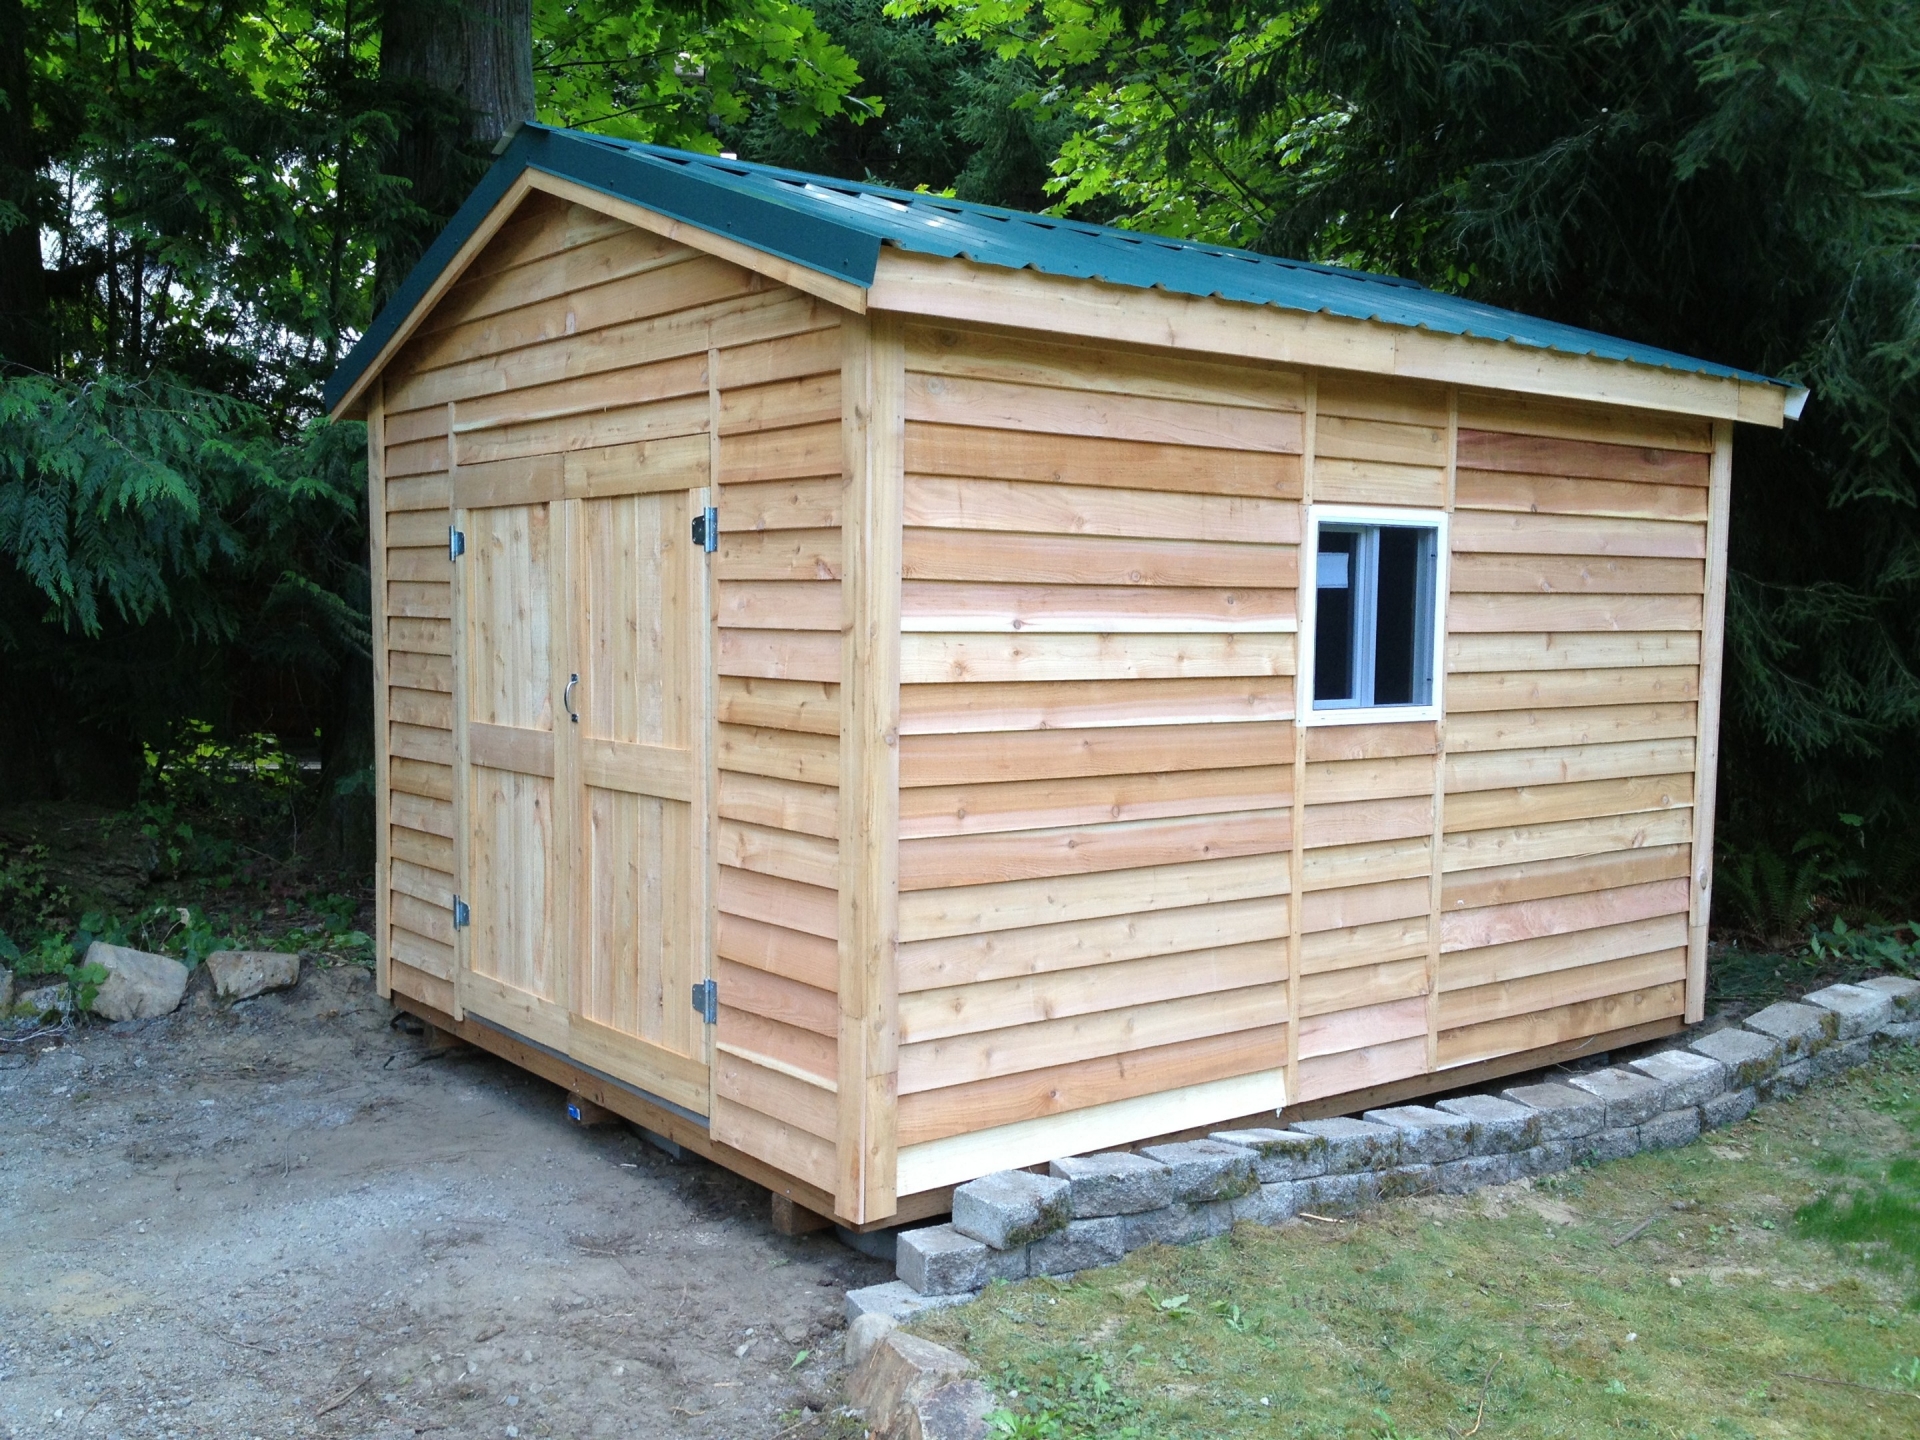
The foundation: The foundation is the base of your shed. It's the part that holds everything up. Check the plans to see what kind of foundation they call for, like a concrete slab or wooden piers.
Framing: This is the skeleton of your shed. It's the framework that supports the walls, roof, and floor. You'll see measurements and details for each piece of wood in the framing.
Roof: The roof is the top of the shed. Pay attention to the roof pitch and the type of roof truss system used in the plans.
Walls: This is the part of the shed you'll actually see. The plans will show you the details of the wall framing, including the location of windows, doors, and siding.

### Starting Small: Simple Modifications for Beginners

Let's start with some simple modifications that are easy to do and won't mess with the structural integrity of the shed. Think of these as your beginner customization skills:

Height: Want a taller shed to store those kayaks or tall boxes? No problem! Simply adjust the wall framing height on the plans. Just make sure you adjust the roof framing accordingly to maintain the roof pitch.
Width: Need a wider shed to fit that lawnmower and all the gardening equipment? Expand the floor plan by increasing the width of the walls and adjusting the roof framing.
Door Placement: Don't like the default door location? Move it! Just ensure the door fits within the existing wall framing and doesn't interfere with any structural components.
Window Placement: Want a window to bring in some natural light? Pick a spot on the wall and add it to your plans. Make sure the window fits within the existing wall framing and doesn't compromise the structural integrity.

### The Advanced Level: More Complex Modifications

Ready to take things up a notch? Here are some modifications that require a little more knowledge and planning:

Adding a Porch: Who doesn't love a little porch to sit and enjoy the outdoors? You'll need to add a porch roof, support posts, and stairs. This requires some extra framing work and you'll need to adjust the foundation to accommodate the new space.
Adding a Loft: Want extra storage space? Adding a loft is a great way to maximize your shed. You'll need to add additional framing and create a sturdy floor for the loft.
Changing the Roof Pitch: A steeper roof pitch can help shed rain and snow more effectively. This requires adjustments to the roof framing and might affect the overall height of the shed. Be careful with this one as it could impact structural integrity.
Adding a Gable Roof: A gable roof with its triangular shape can offer better drainage and can be more aesthetically pleasing than a simple shed roof. It'll require some serious framing adjustments and planning.

### The Importance of Engineering and Safety

Now, here's the important part: Modifying shed plans can be a great way to personalize your shed. But always check with a qualified engineer before making any significant changes to the structure. This is especially important if you're making changes to the foundation, roof framing, or other structural components. An engineer can help you ensure that your modifications are safe and won't compromise the integrity of the shed.

### Taking the Plunge: Let's Get Building!

You're armed with knowledge, a little confidence, and your customized shed plans. Remember:

Start slow: Don't be afraid to tackle the smaller modifications first. It'll give you experience and build your confidence.
Double-check your measurements: Mistakes happen, so always double-check your measurements before cutting any wood.
Be precise: When it comes to framing and construction, precision is key.
Ask for help: Don't be afraid to ask for help from friends, family, or professionals if you need it.

Building a shed is a rewarding experience, and customizing it makes it even more special. So go out there, get those tools ready, and build yourself a shed that's as unique as you are!

Share:

The ultimate guide to lean-to storage shed construction

The ultimate guide to lean-to storage shed construction


Alright, folks, you've got stuff. And by stuff, I mean a lot of stuff. The garage is overflowing, the basement is a disaster zone, and your lawn resembles a storage unit with a bit of grass thrown in. It's time for a solution, and a lean-to storage shed might just be the answer to your clutter woes.

Building your own lean-to shed is a project that's surprisingly achievable, even for those who haven't wielded a hammer since their childhood playhouse days. It's a great way to add some extra storage space and a touch of charm to your yard, all while saving a pretty penny compared to buying a pre-made shed.

Let's Get Started: The Planning Phase

Before you start swinging lumber, there are a few things to consider:

Location, Location, Location: Where will your lean-to live? Make sure it's in a spot that's accessible, level, and meets any local building codes. Consider drainage, sunlight, and proximity to other structures.
Size Matters: Think about what you'll be storing and how much space you need. A smaller lean-to might suffice for gardening tools, while a larger one can handle outdoor furniture, bicycles, and maybe even a few extra lawn chairs.
Material Magic: Choose your materials wisely. Wood is the traditional choice, offering a natural look and ease of workability. Metal is more durable, but can be more expensive. And if you want to go fancy, you can even find pre-engineered shed kits.
Permitting Paradise: Check with your local building department about any permits required. You might not need anything for a simple lean-to, but it's always best to be on the safe side.
Sketch it Out: Before you head to the lumberyard, draw up a rough sketch of your shed. This will help you visualize the dimensions, roof pitch, and any special features you want to add.

The Build-Up:

Once you've got your plan in place, it's time to get those hands dirty:

Foundation First: For a lean-to, you'll need a foundation that's attached to your existing structure. A simple concrete pad or a reinforced wood frame will do the trick. Make sure it's level and secure.
Framing Frenzy: Start by building the frame of your lean-to. You'll need pressure-treated lumber for the base and posts. The posts should be tall enough to accommodate the height of your roof.
Roofing Revelation: The roof of a lean-to is a simple affair. You'll need rafters, sheathing, and roofing material. Choose a pitch that will allow for proper water runoff and consider the style you want (shingles, metal, etc.).
Walling Wonder: Once your roof is in place, you can build the walls. Use plywood or OSB sheathing, and consider adding insulation for added warmth and energy efficiency.
Doors and Windows: Choose a door that fits your needs and add any windows for ventilation and light. Consider adding a small window to the roof if you want natural light to flood the space.
Finishing Touches: Once the structure is complete, you can add siding, trim, and paint. Choose materials that complement your existing house and add a personal touch.

The Final Touches:

Lighting Up: Add some lighting inside the shed for those late-night tasks.
Flooring Fun: Decide on a floor that's durable and suits your storage needs. Concrete, wood, or even tile can be used.
Shelving Savvy: Make the most of your space by adding shelves, hooks, and storage bins.
Secure Your Space: Add a padlock or lockable door to keep your belongings safe.

Tips & Tricks:

Safety First: Always wear safety glasses and gloves when working with power tools.
Measure Twice, Cut Once: Don't rush the measuring process. A few extra inches can make all the difference.
Get Help: If you're not comfortable with certain aspects of the project, don't hesitate to enlist a friend or family member for help.

Building your own lean-to shed is an achievable project that will give you a sense of accomplishment and a much-needed storage solution. It's a fantastic way to personalize your outdoor space and add some extra functionality to your property. And who knows, maybe you'll even find a bit of joy in the process! So get out there, grab your tools, and let's start building!

Share:

How to make a 12x16 shed for storage needs

How to make a 12x16 shed for storage needs

Alright, you're ready to tackle that shed project, huh? You want a 12x16, enough room to store all your stuff and maybe even a workspace. This is a pretty common size, and you're in for a rewarding experience. It's not rocket science, but there's a good amount of work involved.

First things first, let's get the basics down. You'll need a plan - this is your roadmap, so make sure it's clear and detailed. There are tons of free shed plans online, or you can pay for a more detailed one. I'm a fan of the free plans, but they might be a little less specific. You'll also need to decide on the style, the roof pitch, and the overall look you want.

Now, you'll need some supplies, a fair amount of them. Here's a basic rundown of what you'll need:

Materials

Lumber: This is the backbone of your shed. You'll need pressure-treated lumber for the foundation, 2x4s and 2x6s for the framing, and plywood for the walls and roof. Think of it like this: You'll be building a big box, so plenty of lumber is needed!
Fasteners: Lots of nails, screws, and maybe some metal brackets. Don't skimp on quality here â€" you don't want your shed falling apart.
Roofing: Shingles, felt paper, and any necessary underlayment. You'll also need flashing for around the roof edges and chimney if you're adding one.
Siding: This is what gives your shed its look. Choose something durable and weatherproof. You'll also need trim for around the windows and doors.
Windows and Doors: Pick what fits your needs. You want some light and ventilation, but not too much that it's drafty.
Foundation: You'll need concrete blocks or poured concrete for the foundation. This is really important for keeping your shed level and stable.

Tools

Circular saw: You'll be cutting a lot of wood, so a circular saw is essential.
Hammer: For driving those nails.
Level: This will ensure that your shed is built level.
Tape measure: You'll be measuring everything, so a trusty tape measure is a must.
Safety gear: Goggles, gloves, and hearing protection â€" safety first, always!

Let's get started!

1. Foundation

First, you'll need to lay out your foundation. Use string and stakes to create a rectangle, the exact size of your shed.
Level the ground and make sure the corners are square.
Now, start laying your foundation. You can use concrete blocks, or you can pour a concrete slab.
You'll need to secure your foundation to the ground with rebar or anchors.

2. Framing

Once your foundation is set, it's time to frame the walls. You'll be using pressure-treated lumber for the bottom plates, and 2x4s for the wall studs.
Cut your lumber to size and attach it to the foundation using nails or screws.
Don't forget to add bracing for extra strength.

3. Sheathing

Now you'll be adding the sheathing. This is the plywood that goes over the framing to create a solid wall.
Cut the plywood to fit and attach it to the studs using nails or screws.
You'll also need to add a vapor barrier to prevent moisture from getting into the shed.

4. Roofing

You're getting close to the finish line now!
You'll start by framing the roof. Use 2x4s for the rafters and attach them to the top plates of the walls.
Install plywood sheathing on top of the rafters.
Then it's time for the roofing! Install roofing felt paper, then shingles.
Don't forget to add flashing around the edges of the roof to prevent leaks.

5. Siding

Now it's time to make your shed look good. You can use vinyl siding, wood siding, or even metal siding.
Cut the siding to fit and attach it to the walls using nails or screws.
Don't forget to add trim around the windows and doors.

6. Windows and Doors

Cut out openings in the walls for the windows and doors. Install the windows and doors using screws or nails.

7. Finish Touches

You're almost there! Add the finishing touches, like gutters, downspouts, and a paint job.
You can also add some landscaping around the shed to tie it into your yard.

The finishing touches are the fun part. You can personalize your shed with paint, trim, and even a cool front door. Maybe you want a classic red shed, or a more modern, earth-tone look. Let your creativity shine!

And remember, patience is key! Building a shed is a labor of love, and it takes time. If you get stuck, don't be afraid to ask for help. There are plenty of resources online, and you can always ask a friend or neighbor for advice.

Once you're done, you'll have a beautiful, functional shed that you can enjoy for years to come!

Share:

The best diy garden shed plans for a 12x16 shed

The best diy garden shed plans for a 12x16 shed


Alright, folks, let's talk sheds! You've got a vision - a tidy, organized space for your tools, gardening supplies, or maybe even a little workshop. And you're thinking, "Why pay someone to build it when I can do it myself?" You're in the right place! Building a 12x16 shed is a fantastic project, and with the right plans, you can turn your dream into reality.

Now, let's be real, building a shed isn't a walk in the park, but it's definitely doable. It's a chance to learn some new skills, save some money, and get that satisfaction of building something awesome with your own two hands. Plus, you'll have a super cool story to tell at the next barbecue.

Choosing the Right Plans:

The first step is finding the perfect set of plans. You can find them online, in DIY magazines, or even at your local lumberyard. Don't just grab the first set you see - take your time and consider your needs and budget.

Here's what to look for in a good set of plans:

Detailed Drawings: Make sure they have clear, easy-to-understand diagrams of all the components, including walls, roof, and framing.
Cut List: This should tell you exactly what size and type of lumber you'll need, so you can get everything at the lumberyard in one trip.
Material List: This will include everything from screws and nails to paint and shingles. It's like your shopping list, so you don't forget anything.
Step-by-Step Instructions: Think of these like your "build-along" guide. The steps should be clear and easy to follow, with plenty of pictures or illustrations.

Planning Your Shed's Location:

Before you start digging, you'll need to figure out the perfect spot for your shed. Consider the following:

Sun and Shade: Do you want it in a sunny spot for gardening tools or a shady area for a workshop?
Access and Drainage: You need to be able to get in and out easily, and the area needs good drainage to prevent water buildup.
Setbacks: Check your local building codes for minimum distances your shed needs to be away from your house, property lines, and any other structures.
Utilities: If you plan to run electricity or plumbing, you'll need to make sure you can access these utilities.

Foundation, Foundation, Foundation:

Now for the fun part - the foundation! This is the base of your shed, so you want to make sure it's sturdy and level. Here are a few options:

Concrete Slab: The most durable option, but it requires more work and materials.
Wood Frame on Concrete Piers: A great option for areas with good drainage, but it's still important to make sure the piers are level.
Pressure-Treated Wood Skirts: A more budget-friendly option, but it's not as durable as concrete.

Framing Your Shed:

Once your foundation is set, you can start framing the walls and roof. Here's the breakdown:

Wall Framing: Follow the plans closely, making sure your walls are square and plumb (perfectly vertical).
Roof Framing: The roof is the most crucial part. There are different designs (gable, hip, shed) so make sure you choose the one that best suits your plans and your building abilities.
Sheathing: This adds strength and rigidity to the walls and roof. Choose plywood or OSB (oriented strand board).

Enclosing Your Shed:

Now, you'll be adding the siding, roof covering, windows, and door. Here's what to keep in mind:

Siding: Choose a material that suits your style and budget. Vinyl, wood, and metal are all popular options.
Roof Covering: Asphalt shingles are the most common and affordable option. But you can also consider metal roofing for a more modern look and better longevity.
Windows and Doors: Size and placement are important. Consider natural light and airflow when choosing your windows.

Finishing Touches:

The final step is to add the finishing touches that will turn your shed from a structure into a truly awesome space.

Interior Walls and Ceiling: Paint them to create a fresh, clean look.
Flooring: Wood, concrete, or vinyl flooring all work well for sheds.
Insulation: This will keep your shed warmer in the winter and cooler in the summer.
Shelving and Storage: Design and install shelving and storage systems to maximize your space and keep things organized.

Safety First, Always:

Building a shed is a rewarding experience, but it's also important to be safe. Here are some tips:

Wear Safety Glasses: Protect your eyes from flying debris.
Use Hearing Protection: Power tools can be loud, so protect your hearing.
Use the Right Tools: Don't try to use tools you're not familiar with.
Ask for Help: If you need help with a particularly challenging step, ask a friend or family member for assistance.

Building a shed is a great way to create a functional and personalized space for your outdoor needs. With the right plans and a little elbow grease, you can build a shed that you'll love for years to come. Remember to have fun, be patient, and celebrate your accomplishments along the way!

Share:

Budget-friendly diy garden shed plans for small spaces

Budget-friendly diy garden shed plans for small spaces


Hey there, fellow garden enthusiasts! Are you staring longingly at those overflowing toolboxes and dreaming of a place to store your gardening gear? Let's face it, a dedicated shed is a lifesaver for keeping your tools organized and your yard tidy. But who wants to shell out a fortune on a fancy pre-made shed when you can DIY your own?

This guide is all about building a budget-friendly garden shed perfect for small spaces, because let's be real, not everyone has a huge backyard to play with. We'll be diving into practical design tips, affordable materials, and step-by-step instructions to help you get your dream shed built without breaking the bank.

The Tiny House Revolution: Embrace Small Spaces

Think of your shed like a tiny house for your tools! When space is limited, embracing a smaller footprint is key. We're not talking about squeezing your lawnmower into a broom closet, but rather focusing on efficient design that maximizes every inch.

Choosing the Right Size and Location:

Measure Twice, Cut Once (And Then Measure Again): Start by carefully measuring the available space in your yard and consider factors like access, sunlight, and proximity to your house.
Less Is More (Usually): A 6x8 or 8x8 shed is a great starting point for most small yards. This size offers enough space for essential tools and supplies without feeling overwhelming.
Think Vertically: If your footprint is limited, think about building up! A shed with a loft or a shelf system can provide ample storage space without taking up too much ground area.

Budget-Friendly Material Magic:

Reclaimed and Repurposed: Embrace the "upcycled" trend! Look for salvaged wood from old fences, pallets, or even discarded furniture. You can save a ton of money and give those materials a new lease on life. Just make sure the wood is sound and free of rot or pests before you start building.
Pressure-Treated Lumber: While not the cheapest option, pressure-treated lumber is a great investment for the longevity of your shed. It stands up to the elements and prevents rot, saving you headaches in the long run.
Metal Roofing: Metal roofing is lightweight, durable, and relatively inexpensive. It comes in a variety of colors to complement your backyard aesthetic.
DIY Doors and Windows: Save money by building your own doors and windows from pre-made frames. If you're feeling ambitious, you can even use recycled materials to add unique character.

Let's Build! A Step-by-Step Guide

Now for the fun part: building your shed! We'll walk you through the basic steps, but remember to consult with your local building codes and regulations for specific requirements.

1. Foundation First: Your shed needs a solid foundation. For a budget-friendly option, consider a concrete slab or a simple gravel base. Make sure it's level and strong enough to support the weight of your shed.
2. Framing Up: The framework is the backbone of your shed. You'll need to build sturdy walls and a roof using lumber and fasteners.
3. Sheathing and Siding: Cover the frame with plywood sheathing for structural integrity and add siding of your choice. Think about using affordable options like plywood, cedar, or even corrugated metal.
4. Roofing Time: Install your chosen roofing material, whether it's metal, shingles, or even recycled corrugated plastic. Remember to have a good overhang for protection from the elements.
5. Door and Window Magic: Cut out openings for your doors and windows, carefully framing them in for a snug fit.
6. Finishing Touches: Add details like trim, weatherstripping, and a door handle. Paint or stain your shed to match your garden's style.

DIY Doesn't Mean Doing it Alone:

Remember, building a shed is a project, not a race! Don't be afraid to ask for help from friends or family. Even if you only need someone to hold a board steady while you nail it, it's always easier with an extra pair of hands.

The Reward: A Shed That Feels Like Home

There's nothing quite like the satisfaction of building your own garden shed. You'll have a place to organize your tools, store your supplies, and maybe even sneak away for a quiet moment of peace. And the best part? It's a project that can be adapted to fit your budget, skills, and available space.

So grab your tools, gather your supplies, and let's get building! Your dream shed awaits!

Share:

How to build a 10x12 garden shed for all your gardening needs

How to build a 10x12 garden shed for all your gardening needs


Alright, fellow green thumbs, let's talk about building your own garden shed. I know what you're thinking: "Building a shed? That sounds like a lot of work!" Trust me, it's not as daunting as it seems. With a little planning, patience, and maybe a friend to lend a hand, you can have your very own sanctuary for all things gardening.

First things first: planning is key. Think about what you'll use the shed for. Will it be a storage space for tools, potting soil, and seeds? A cozy workshop for tinkering and crafting? Maybe a mini greenhouse for starting seedlings?

Once you have a clear vision, let's talk dimensions. A 10x12 shed is a good starting point, offering plenty of space without being too overwhelming. And don't forget about the location! Choose a spot that's accessible and gets some sunlight (especially if you're planning on using it as a greenhouse).

Now, let's talk materials. You'll need:

Lumber: The foundation of your shed. Opt for pressure-treated wood for the floor joists and sill plate to prevent rot.
Sheathing: This will create a sturdy base for your siding and roofing. Plywood is a common choice.
Siding: Choose a material that complements your house or fits your style. Options include wood, vinyl, metal, or fiber cement.
Roofing: Shingles, metal, or even a green roof are all possibilities.
Doors and windows: Think about the size and number of doors and windows you need for access and ventilation.
Hardware: This includes screws, nails, hinges, door handles, and any other fasteners you'll need.
Insulation: Optional but highly recommended if you plan on using the shed year-round.
Paint or stain: Choose a color that will blend in or stand out, depending on your preference.

Let's get down to the nitty-gritty: The Construction Process

1. Laying the Foundation:

Start by leveling the ground. This is crucial for a stable shed. You can use gravel or concrete blocks to create a foundation.
Place the sill plate (a long piece of pressure-treated lumber) around the perimeter of your foundation. Secure it with screws or lag bolts.

2. Framing the Walls:

Cut your wall studs (typically 2x4s) to the desired height.
Attach them to the sill plate using screws or nails. Make sure your walls are square and plumb!
Add a top plate (another piece of 2x4) along the top of the walls for extra support.

3. Building the Roof:

Decide on the style of your roof (a gable roof is common and easy).
Cut and attach the roof rafters to the top plates and a ridge board in the center.
Secure the rafters with joist hangers or roof truss plates.
Attach sheathing to the rafters for a solid base for the roofing material.

4. Installing the Doors and Windows:

Measure carefully and cut openings for your doors and windows.
Use a framing square to make sure they are square and plumb.
Install the door and window frames and secure them to the wall.

5. Adding Siding:

Attach your chosen siding material to the sheathing. Follow the manufacturer's instructions.
For wood siding, you'll need to cut and install trim pieces to create a finished look.

6. Installing the Roofing:

Start by laying down a layer of underlayment for extra protection.
Then, install your chosen roofing material.
Always follow the manufacturer's instructions for proper installation.

7. Finishing Touches:

Add any interior trim, like baseboards and crown molding.
Install electrical wiring and lighting if you plan on using the shed for more than storage.
Paint or stain the exterior of your shed to give it a polished look.

Don't forget the fun part! Once your shed is built, it's time to personalize it.

Add some shelves and storage solutions for your gardening gear.
Hang hooks for tools and gloves.
Create a work bench for potting and planting.
Decorate it with plants, photos, or anything that makes it feel like your own.

There you have it! Building your own garden shed is a rewarding project that will give you years of enjoyment. Don't be afraid to get your hands dirty and embrace the challenge. And remember, you can always ask for help from friends or family.

Building a shed is more than just construction, it's a chance to connect with your love for gardening and create a space that reflects your personal style. So, grab your tools and get building! You'll be surprised by what you can achieve.

Share:

Building a lean-to shed: everything you need to know

Building a lean-to shed: everything you need to know


Hey there, fellow DIY enthusiasts! So, you're thinking about building a lean-to shed? Awesome! These little structures are super versatile, perfect for storing tools, bikes, gardening supplies, or even just a cozy spot for a hammock on a sunny day. And the best part? You can build one yourself, saving a ton of cash and giving you a sense of accomplishment that'll make you beam like a proud parent on picture day.

But before we get into the nitty-gritty, let's make sure you're ready for this project. Building a lean-to isn't rocket science, but it does involve some basic carpentry skills and a bit of elbow grease. Don't worry, we'll walk you through every step, and even if you're a newbie, you'll be surprised at what you can achieve.

Step 1: Planning is Key - Don't Go Jumping into the Deep End

First things first, you gotta plan. It's like prepping for a road trip â€" you don't just hop in the car and start driving. You need a map, right?

What will you store in your shed? This determines the size. A small lean-to for tools is different than a spacious one for bikes and garden equipment.
Where will it go? Consider sun exposure, drainage, and the overall aesthetic of your yard.
What materials will you use? Wood is the most popular choice, but consider pressure-treated lumber for longevity.
Do you need permits? Check with your local building department. They might need a blueprint or require inspections.

Step 2: Gathering Your Supplies - Time to Hit the Hardware Store

Now that you've got a plan, it's time to gather your gear. Here's a general list, but adjust it based on your design:

Lumber: This is the backbone of your shed. You'll need pressure-treated for the foundation, and regular lumber for the walls and roof.
Framing lumber: Use 2x4s for the wall studs and roof rafters.
Plywood: For the sheathing (covering the framing).
Roofing materials: Asphalt shingles are common, but you can also use metal roofing or even recycled materials.
Hardware: Nails, screws, brackets, hinges, and a weatherproof sealant.
Tools: A tape measure, saw, hammer, drill, level, and a circular saw (or a jigsaw if you're handy).
Safety gear: Safety glasses, work gloves, and ear protection are essential.

Step 3: Laying the Foundation - The Building Blocks of Success

A stable foundation is crucial. Here are your options:

Concrete: Strong and durable, but requires expertise and time.
Pressure-treated lumber: This is a common choice for lean-tos. Create a rectangular frame with posts sunk into the ground.
Concrete blocks: Affordable and easy to install, but make sure they're level.

Step 4: Building the Walls - Like Putting Together a Puzzle

Now the fun begins! Here's a breakdown:

1. Construct the wall frame: Use 2x4s and your saw to cut and join the studs.
2. Attach the wall frame to the foundation: Make sure it's level and plumb (straight up and down).
3. Sheath the walls: Use plywood to cover the frame, creating a solid surface for siding or roofing.
4. Install siding: This is where you get to personalize your shed. Use wood, metal, or even vinyl siding.

Step 5: Framing the Roof - Reaching for the Sky

The roof of a lean-to is simple, but it needs to be strong:

1. Construct the roof rafters: Cut 2x4s to the desired length and angle them to create the slope.
2. Attach the rafters to the wall frame: Use nails, screws, and brackets for a secure connection.
3. Sheathe the roof: Use plywood or OSB to cover the rafters.
4. Install roofing materials: Choose your preferred roofing, whether it's shingles, metal, or something else.

Step 6: Adding the Finishing Touches - Making Your Shed Shine

Now that you've got the basics done, it's time to personalize your lean-to:

Doors and windows: Choose the right size and style for your needs.
Flooring: Use plywood or flooring boards for a more finished look.
Paint or stain: Protect the wood and add a splash of color to your shed.
Add some extras: Shelves, hooks, or a workbench can make your shed even more functional.

Step 7: The Finishing Touches - Taking Pride in Your Work

You've done it! You've built your own lean-to shed! Give yourself a pat on the back, grab a celebratory beverage, and admire your handiwork. Here are a few tips for the final stages:

Clean up: Remove all the debris and tools.
Seal the shed: Apply a waterproof sealant to protect the wood from the elements.
Enjoy your new space: Now you can organize your tools, store your gear, or relax in the shade of your very own creation.

Remember: This is just a general guide. You might need to adjust it based on your specific needs and location. There are tons of resources available online, like YouTube videos and how-to guides.

Building a lean-to shed is a fantastic way to enhance your property, learn new skills, and save money. It's a rewarding experience that will leave you feeling proud and accomplished. So, what are you waiting for? Grab your tools and let's get building!

Share: